Tables
Tables jls164Tables are difficult to make accessible and responsive. To ensure your course meets current federal accessibility requirements and follows pedagogical best practices, the learning design team will add tables for you. If you wish to add a new table, please provide your learning designer with the table in an alternative format (such as a Word document or Excel file). Once a table is added, you can edit it.
To edit the content of an existing table cell, click the cell and edit.
To add or delete rows or adjust table properties, click anywhere on the table to open the floating toolbar.
The floating toolbar lets you:

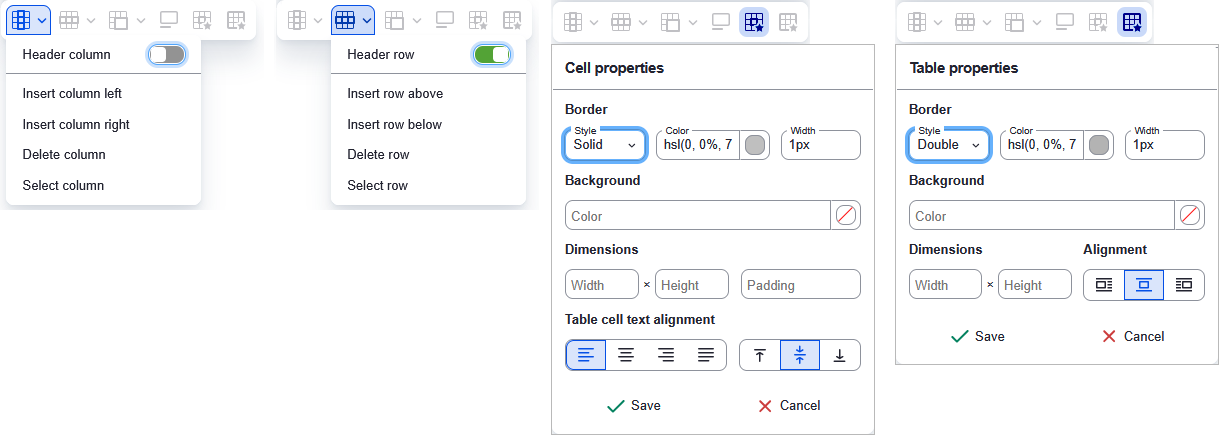
 Add or delete columns and set column headers.
- Set the required header columns by switching the toggle to On (green). See the images below.
 Add or delete rows and set row headers.
- Set the required header rows by switching the toggle to On (green). See the images below.
 Merge and split cells.
- Due to accessibility concerns, please do not merge or split cells.
 Add the required table caption.
- Click on the caption button to toggle the caption on and off.
- The table caption should always be ON.
- Always include a table caption. Captions explain the purpose of the table and are a required accessibility standard.
- Click on the caption button
 Adjust cell properties, such as alignment.
- For accessibility reasons, please do not adjust the borders or background colors. The course theme controls table styling to ensure readability, contrast, and mobile compatibility. If there is a compelling reason to change these, contact your learning designer to ensure they are accessible.
 Adjust table properties, such as alignment.
- For accessibility reasons, please do not adjust the border, background color, width, or styling. If there is a compelling reason to change these, please work with your learning designer to ensure they are accessible.
The following screen captures show some of the options available in the floating toolbar.
Getting help
Your learning designer is your partner in building effective and engaging online courses. Whether it’s navigating Drupal or refining your content, we’re here to assist. Please don’t hesitate to contact us with questions.